March 8, 2007
Well, I didn't quite finish the cradle before Houston was born, but it's done now and he is sleeping soundly in it. I completed it two weeks after his birth. I'm not going to stain it until he outgrows it since it would be toxic until the finish cures. I plan on using General Finishes Oil Stain followed by 3-4 coats of General Finishes Arm-R-Seal Top Coat, after testing the finish on some scrap. I have three different stains to test, all from General Finishes: Salem, Antique Cherry, and Danish Teak. You can see the color here:
http://www.generalfinishes.com/finishes/oil-base-finishes/oilbase.htm#General%20Finishes%20Seal-a-Cell%20Liquid%20Oil%20Base%20Top%20Coat
I'm pretty nervous about applying the finish. I worked so hard on this and it is priceless to me now. I think my head would explode if I messed up the finish, so I've been researching everything I can find on the subject. I sanded everything from 80-120-150-220 grit, but since learned that with Red Oak, you should stop at 150 grit. Any smoother and the wood won't take the stain. I guess it will be ok to just sand with 150 to rough it up a bit before I start. I'll post the final pictures after that.
Until then, here's the current pictures of the naked cradle...Enjoy!


Above:
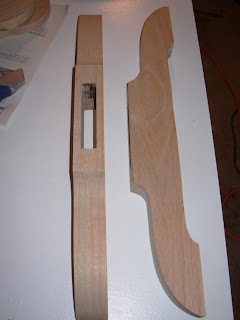
The last pieces I cut out since my last post - uprights, stretcher, and feet. I got a Delta 9" Bandsaw after almost messing up on some of the curved cuts. It made things MUCH easier and reduced the amount of time needed to perfect the rough cuts with chiseling and sanding.
Below:
The square holes you see marked out in the uprights are for the tenons that will be cut on the end of each stretcher, then a mortise will be cut through the top of the tenon for a wedge pin which will secure the assembly. This allows it to be "knocked down" for storage/moving.

Below:
End View of the assembled cradle. Raised Panel, Mortise and Tenon joinery, Beaded Roundover edge routed around uprights...this proved to be the most difficult portion of the project. I could have simply made the end one solid piece of wood, but knew this would be more rewarding in the end.


More views of the assembled cradle:


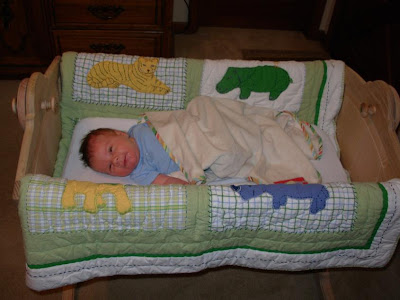
And finally, the cradle in use:
AWWWWWWWWW!!!! You can tell he likes it!!!
One more thing...Houston has taken up a new hobby. He's pretty good for his age!

heh heh I couldn't help myself after seeing this picture:


